

Cum se configurează sursa suplimentară în Google Merchant Center Next și ce mai este nou

During Google Marketing Live in May 2023, Google announced that by 2024, Google Merchant Center Next would gradually replace the classic Google Merchant Center.
It wasn’t until last month (July 2024) that some merchants began to see Google Merchant Center Next rolling out in their accounts. But what does this transition mean for merchants, and how does it differ from the classic version of Google Merchant Center?
In this article, we answer these questions and explain step by step how to address one of the main changes—the new way to upload a supplemental feed and enable feed rules.
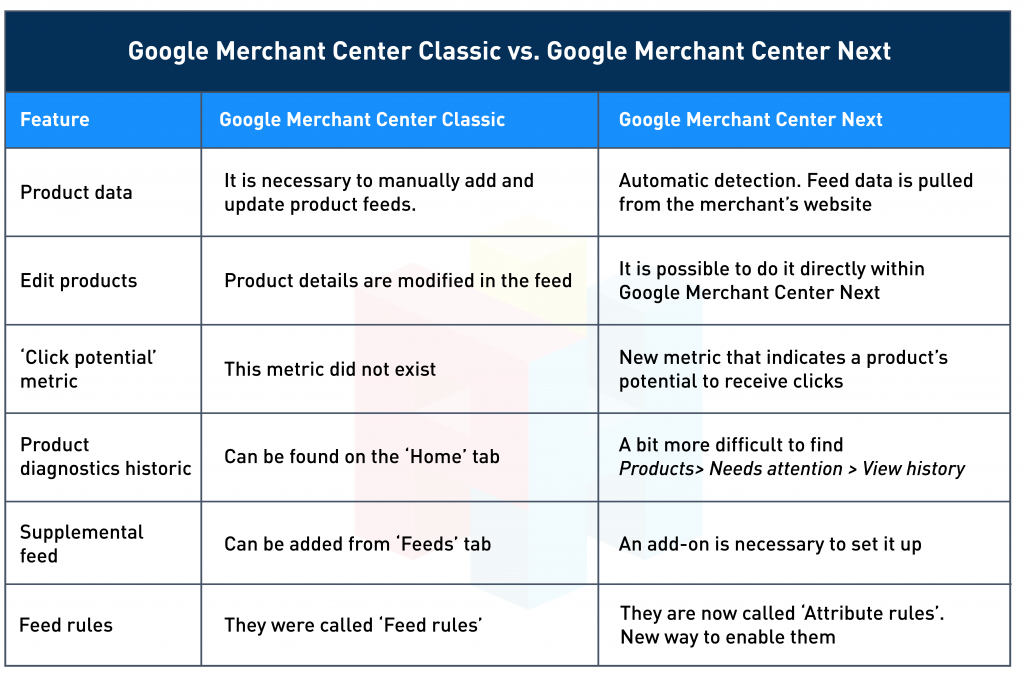
Google Merchant Center Classic vs. Google Merchant Center Next: Changes and new features
Google Merchant Center is a free tool provided by Google that allows merchants to “upload and manage their product data so that products appear across Google Search, Maps, YouTube and more.”
Regarding Google Merchant Center Next, it was presented as an upgraded, simplified, more intuitive, and less technical version of the classic Google Merchant Center. While this new version maintains the essence and main purpose of the classic version, we also see some changes in functionality.
Let’s have a look at the main new features and changes introduced in Google Merchant Center Next:
- Automatic detection of product data: While, in the classic Google Merchant Center, merchants had to manually add and update their product feeds, Google Merchant Center Next automatically pulls feed data (products, images, prices…) from the merchant’s website. This eases the process of setting up a data feed. Note: Google offers the possibility of turning off this feature.
- Edit products directly: In the classic version, merchants had to modify product details in the feed and then synchronize it to apply the changes. With the Merchant Center Next dashboard, you can now edit product titles, prices, descriptions, etc. directly within the platform.
- Introduction of ‘click potential’ metric: This new metric indicates if a product’s potential to receive clicks compared to your other products is low, medium or high. Even if a product has fewer clicks than another, the click potential metric can be higher.

- Product diagnostics historic: In the classic version, the historic product diagnostics appeared on the homepage. However, this timeline is now a bit more hidden in Google Merchant Center Next. Products > needs attention > view history
- An add-on is now necessary to set up the supplemental feed: When the first merchants were transitioned to Merchant Center Next, some functionalities, like supplemental feeds and feed rules, were initially unavailable, but they have since been added. However, there are some changes in this regard, like the way of adding a supplemental feed.
In the section below, we explain the different steps you need to follow to set up the supplemental feed in your Merchant Center Next account. Additionally, we explain where you can now find the attribute rules (formerly known as feed rules).
How to set up the supplemental feed in Google Merchant Center Next
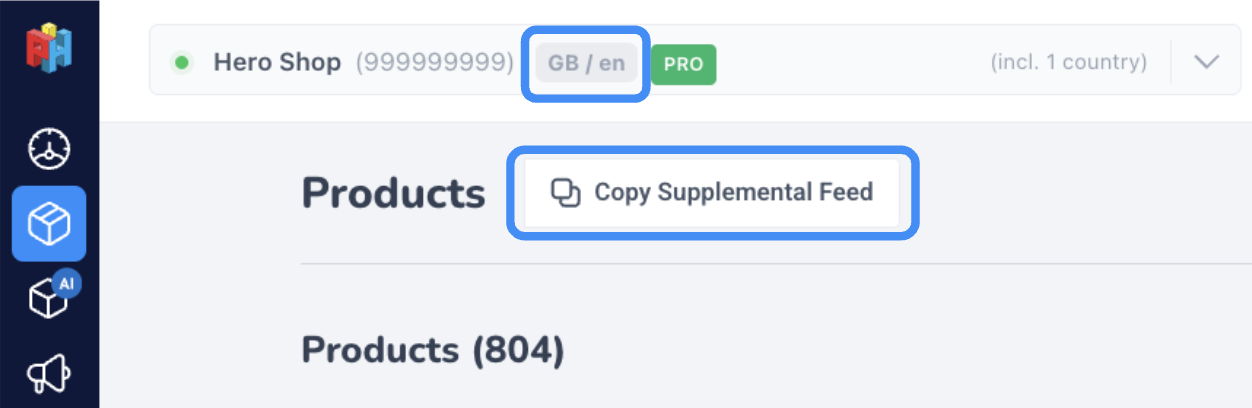
The first step is to copy the supplemental feed from the Producthero platform. IMPORTANT: Remember the feed label/language combination of the feed you copied the supplemental feed from, as you need to fill in the same values in Step 5.
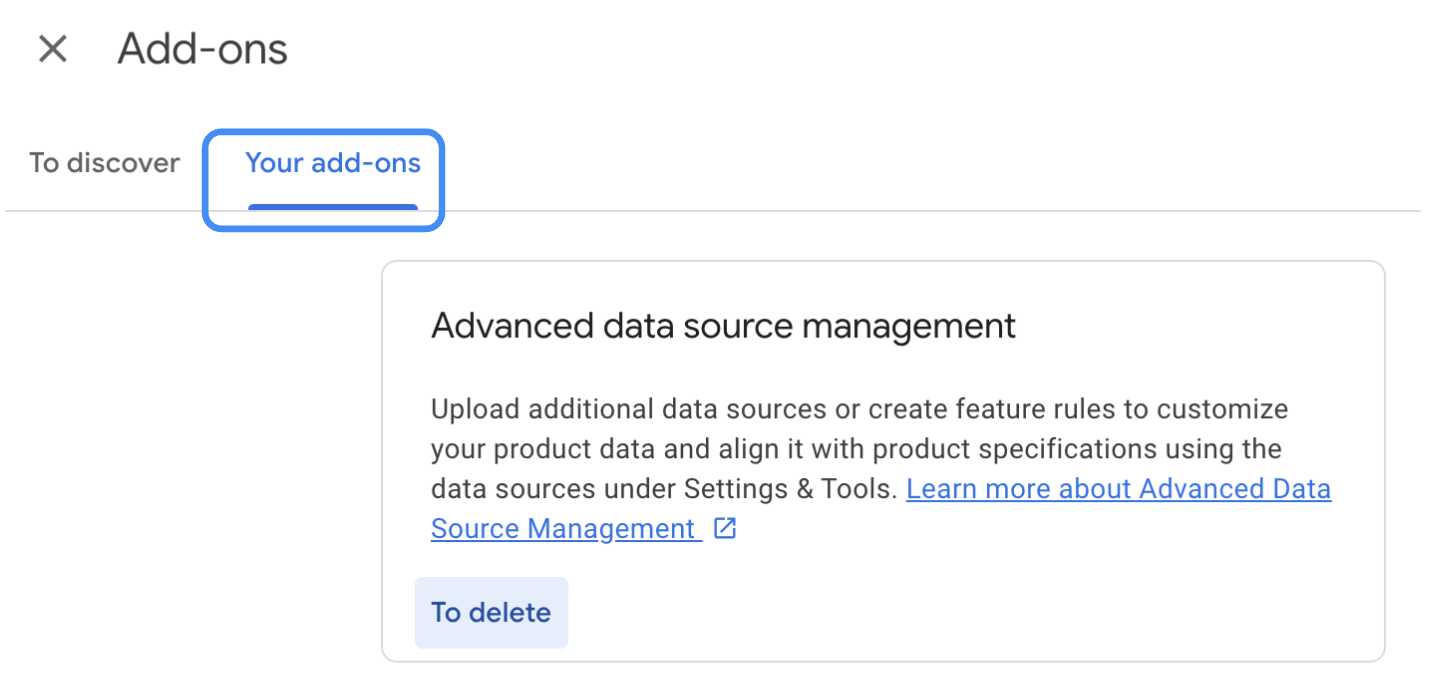
Step 2: Go to your Merchant Center account and check if you have already activated the necessary Add-on to add the supplemental feed. You can check this by going to Settings> Add-ons> Advanced data source management and clicking on ‘Add’. If you already have a supplemental feed implemented in your Merchant Center, you can skip this step.

Once you have clicked on ‘Add’, you will see that ‘Advanced data source management’ has been added to the ‘Your add-ons’ tab (see image below).
Step 3 is to navigate to ‘Data sources’ via your account settings and select the ‘Supplemental sources’ tab. You now have to click on ‘Add supplemental product data.
PS: Make sure that you add the supplemental source under ‘Supplemental sources’ only. Adding it to the ‘Primary sources’ can mess up your feeds. Double-check before proceeding.

In Step 4 you are going to add the supplemental feed. To do this, you have to select ‘Add Product data from file’ and paste the supplemental feed link you copied from the Producthero Platform in Step 1. Click ‘continue’ and go to the next step.

Step 5 is to make sure you add the same feed label/language combination that you chose in the first step. In this case, GB/en. In this step, it is also crucial to select the primary feed to which you want to link the supplemental feed URL.

Click on ‘Create Date Source’ and your supplemental feed is now integrated with your primary data source, and the Producthero Platform is successfully connected to your Merchant Center account.
At first, you will may notice the warning below in your supplemental source: “Fix your product file”. This simply means that the Supplemental Source doesn’t contain any data yet. Once you start using Producthero tools (e.g. optimizing your product titles or setting up the Labelizer strategy) data will automatically start flowing in, and the warning will disappear.

If you would like to add feed rules (now called ‘attribute rules’), click on the feed where you want to apply them. Then, navigate to the ‘Your attribute rules’ tab (see image below). You can now set your feed rules.

Knowing these steps is fundamental to optimising your campaigns, as the supplemental feed connects the Producthero Platform with your Merchant Center. This allows the optimized data—such as optimized titles and Labelizer labels—from our platform to be transferred to your Merchant Center.
Concluzie
Google Merchant Center Next introduces a new, more intuitive interface, as well as new features designed to simplify its user experience. However, it is expected that Google will continue to improve Google Merchant Center Next, gradually introducing more features.
Articolele și studiile noastre de caz
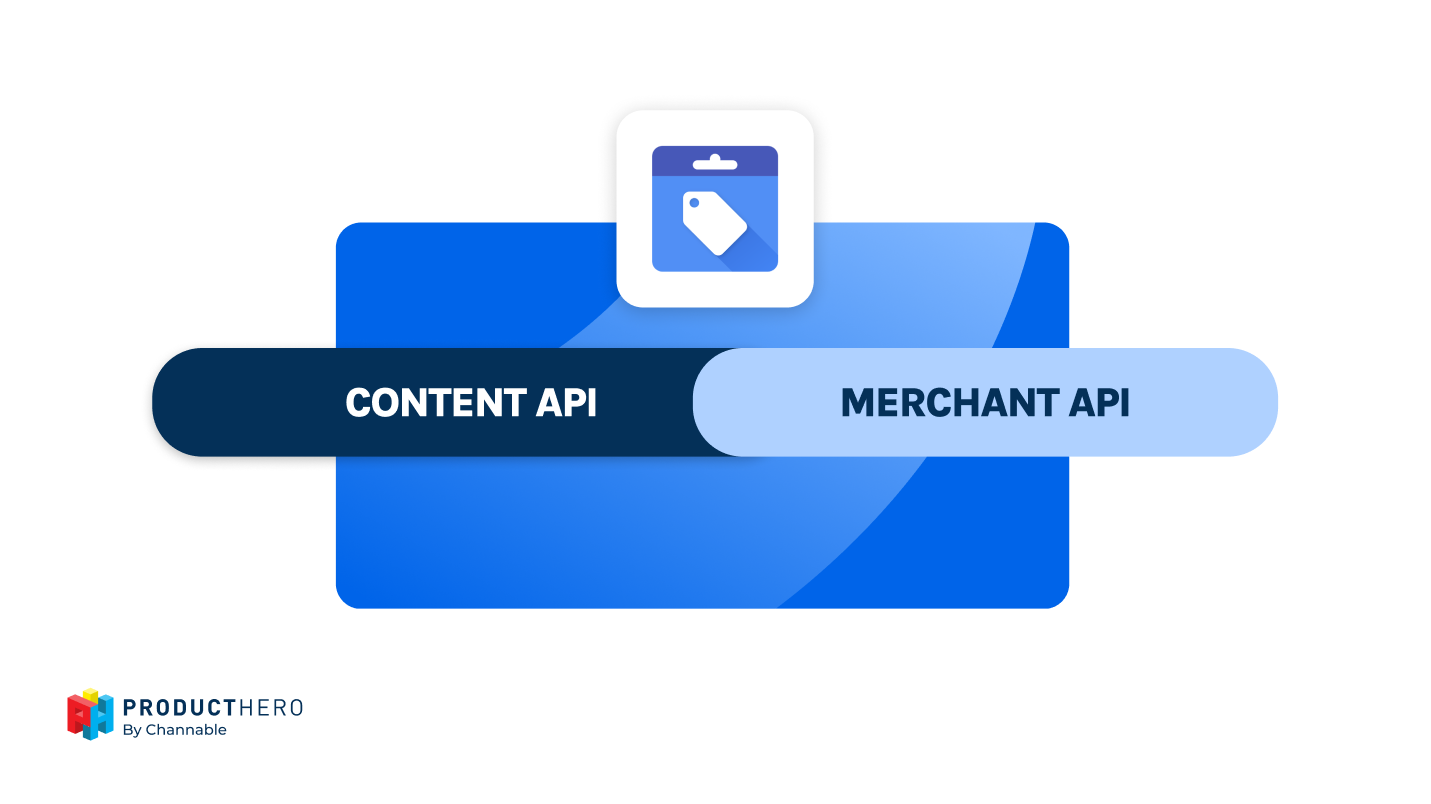
Google renunță la API-ul pentru conținutul Shopping: ce trebuie să știți

Ghid privind declarațiile false în Google Merchant Center
